Tutorial 1 of 7
Your first garden plan in ten minutes
Beginner 10 min
Open a garden template, draw beds, paths and trees to scale, set the place of your garden and keep everything in your browser — the basics of Greenplot.
Greenplot plans your garden on a plan to scale and keeps the season running: beds, sowing dates, tasks, harvests and notes. Everything you do is saved in this browser. There is no account needed, and nothing goes to a server unless you share a garden with a workspace.
Start from a template
The first time you open Greenplot it shows the template Family raised beds. Choose Garden → Templates… to see all five:
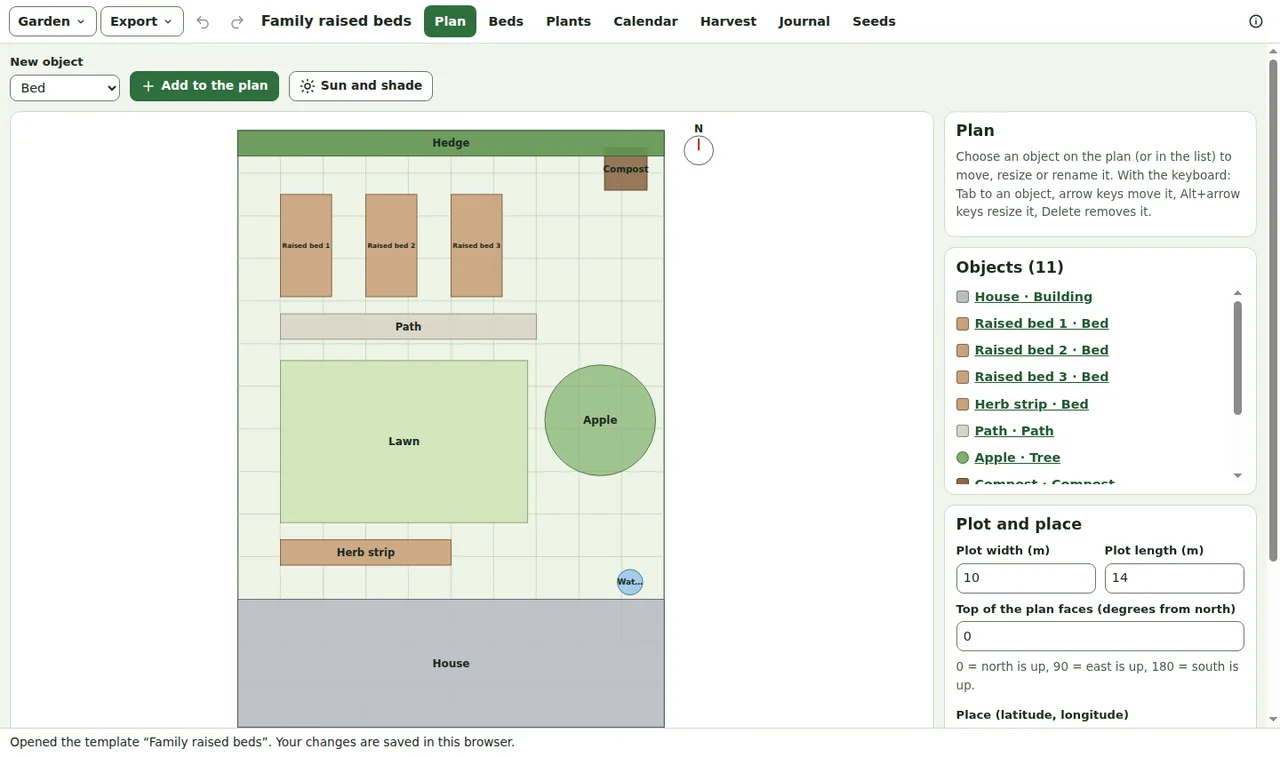
- Family raised beds: three raised beds, a herb strip and an apple tree in front of the house
- Allotment plot in rows: four row beds in a rotation, a fruit row, a greenhouse, the shed and the tap
- Sunny balcony: a railing box, a herb trough and a big tub
- School garden: class beds, a pollinator bed, a pumpkin patch and a pond
- Fruit and flower garden: fruit trees, soft fruit, a cutting garden, a perennial border and bulbs
A template is a complete garden with plantings, tasks, harvests, costs, seeds and journal notes, so every view has something to show. Garden → New garden starts with an empty plot.
Draw the plot
The plan view shows the plot as seen from above, with a grid of one metre. Choose a kind under New object — bed, greenhouse, path, lawn, tree, shrub, hedge, building, shed, fence, compost, water point, pond or seating — and press Add to the plan. The new object appears in the middle of the plot.
Move an object by dragging it with the mouse or a finger, and resize it with the small square at its corner. With the keyboard, press Tab until the object is focused: the arrow keys move it by 10 cm (with Shift by one metre), Alt+arrow keys change its size and Delete removes it.
Choose an object to edit it in the panel on the right: its kind, name, position, size and height. The height matters for the sun map, because tall trees, hedges and buildings cast shade.
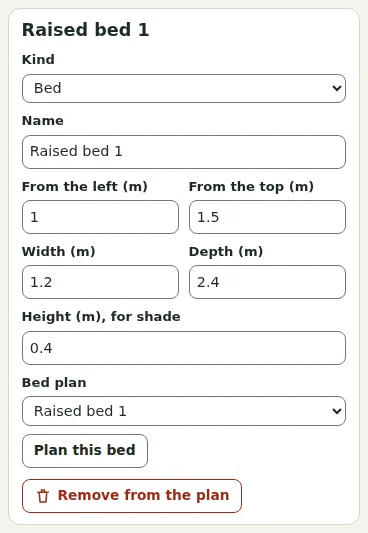
Beds and greenhouses are linked to a bed plan: that is where you plant them, square by square or in rows (see Beds square by square or in rows). Plan this bed jumps straight there.
Size, orientation and place
Under Plot and place you set the plot size in metres and which way the top of the plan faces: 0 means north is up, 180 means south is up. The north arrow on the plan turns with it.
The place is the latitude and longitude of the garden, for example 52.47, 13.40. Use my position asks your browser for it. Greenplot needs the place for the sun map and for weather advice; it is rounded to about one kilometre.
Saved automatically
Every change is saved in this browser a moment after you make it. Garden → Recent gardens… lists what is stored here. Garden → Save file (Ctrl+S) writes a .greenplot.json file that Open file… opens on any device, and Copy garden link… puts the whole garden into a link. Undo (Ctrl+Z) and Redo (Ctrl+Shift+Z) work for every change.
The numbers 1 to 7 switch between the views — plan, beds, plants, calendar, harvest, journal and seeds — and ? lists all keyboard shortcuts.
Ready to try it?